A Minecraft server whitelist lets you keep your server private and restricted to only approved players. When the whitelist is enabled, anyone not on the list will be blocked from joining, making it one of the most effective ways to secure your server - especially if you’re running on a public IP. Operators (OPs) can also toggle the whitelist on or off directly in-game, which is handy for troubleshooting or making quick changes without restarting the server.


Log in to the ChipHead Panel.

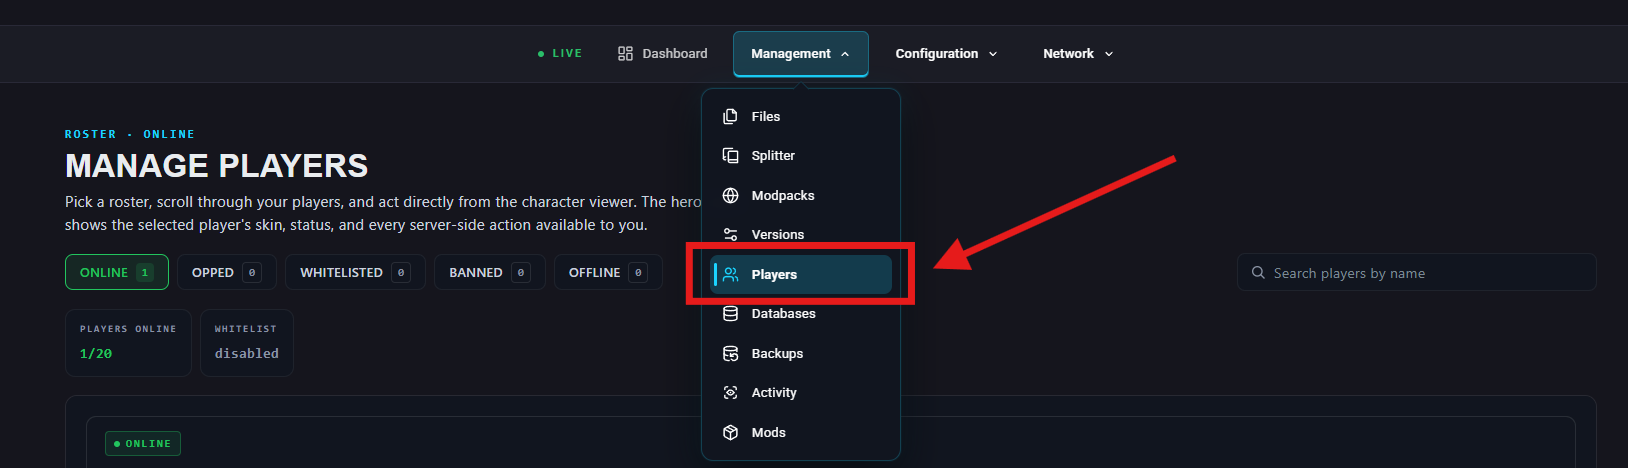
Navigate to Management > Players
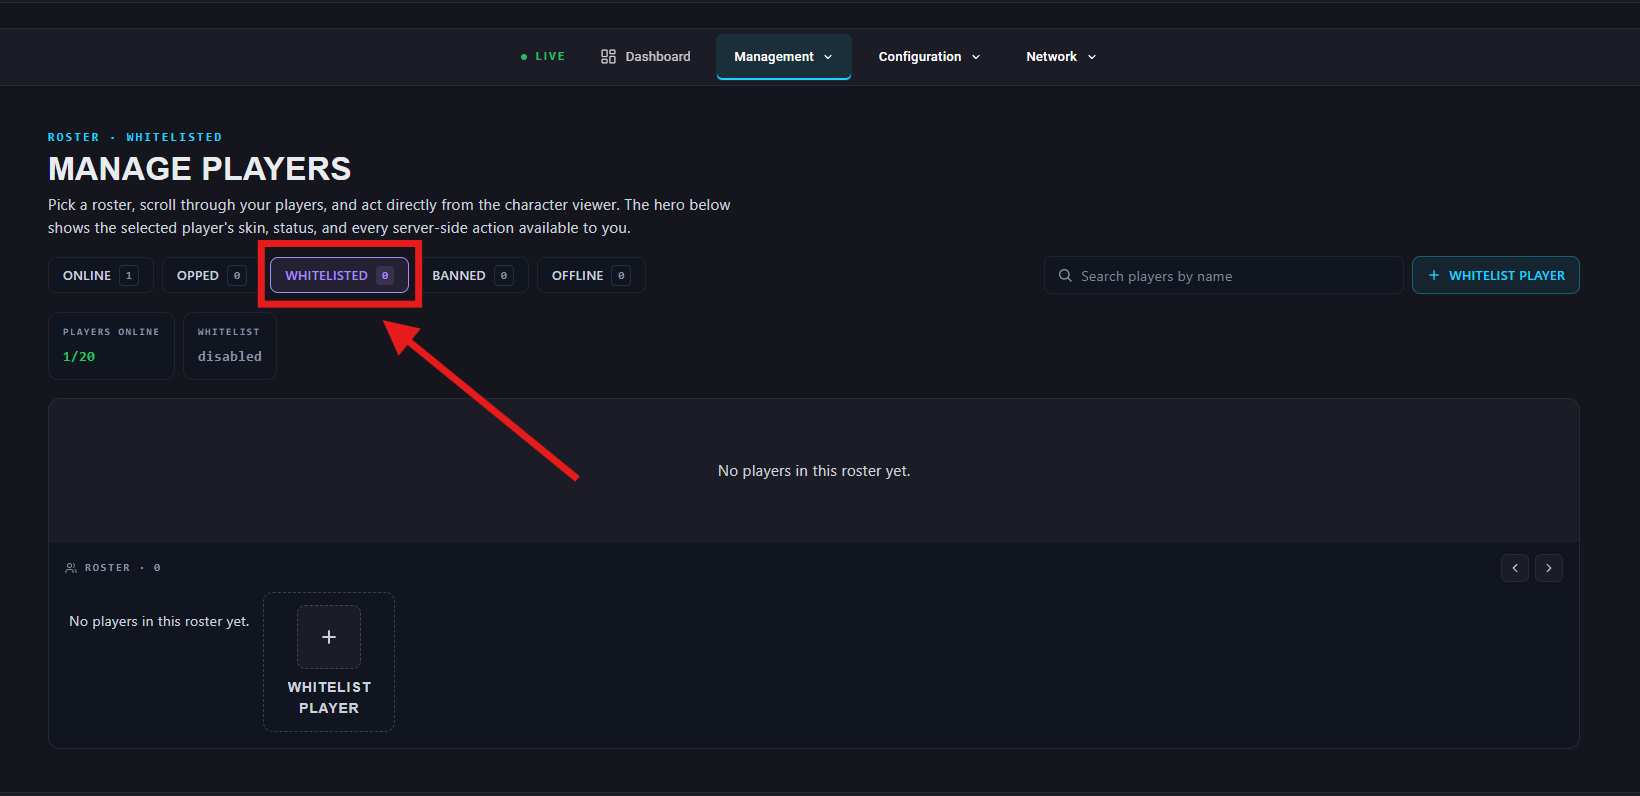
Navigate to “Whitelisted”.
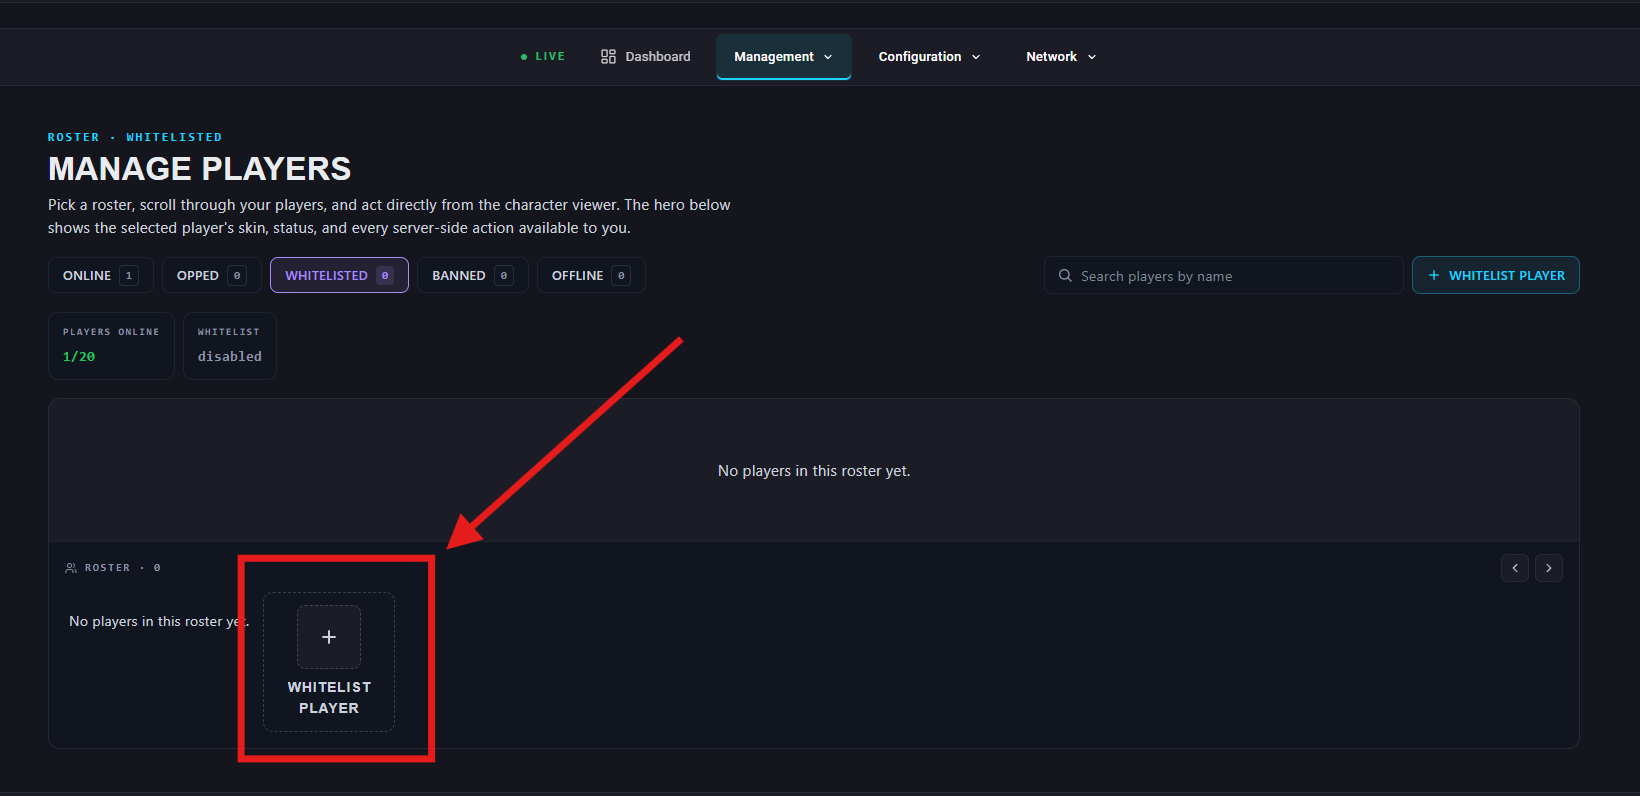
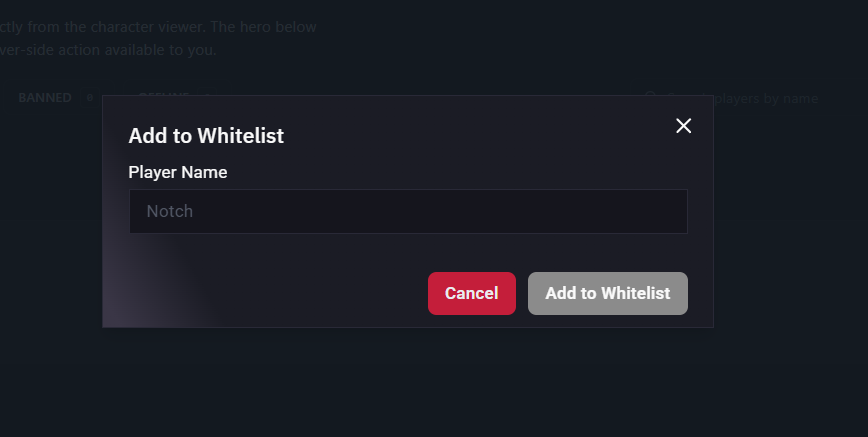
Select “Whitelist Player” and add type their player name in.
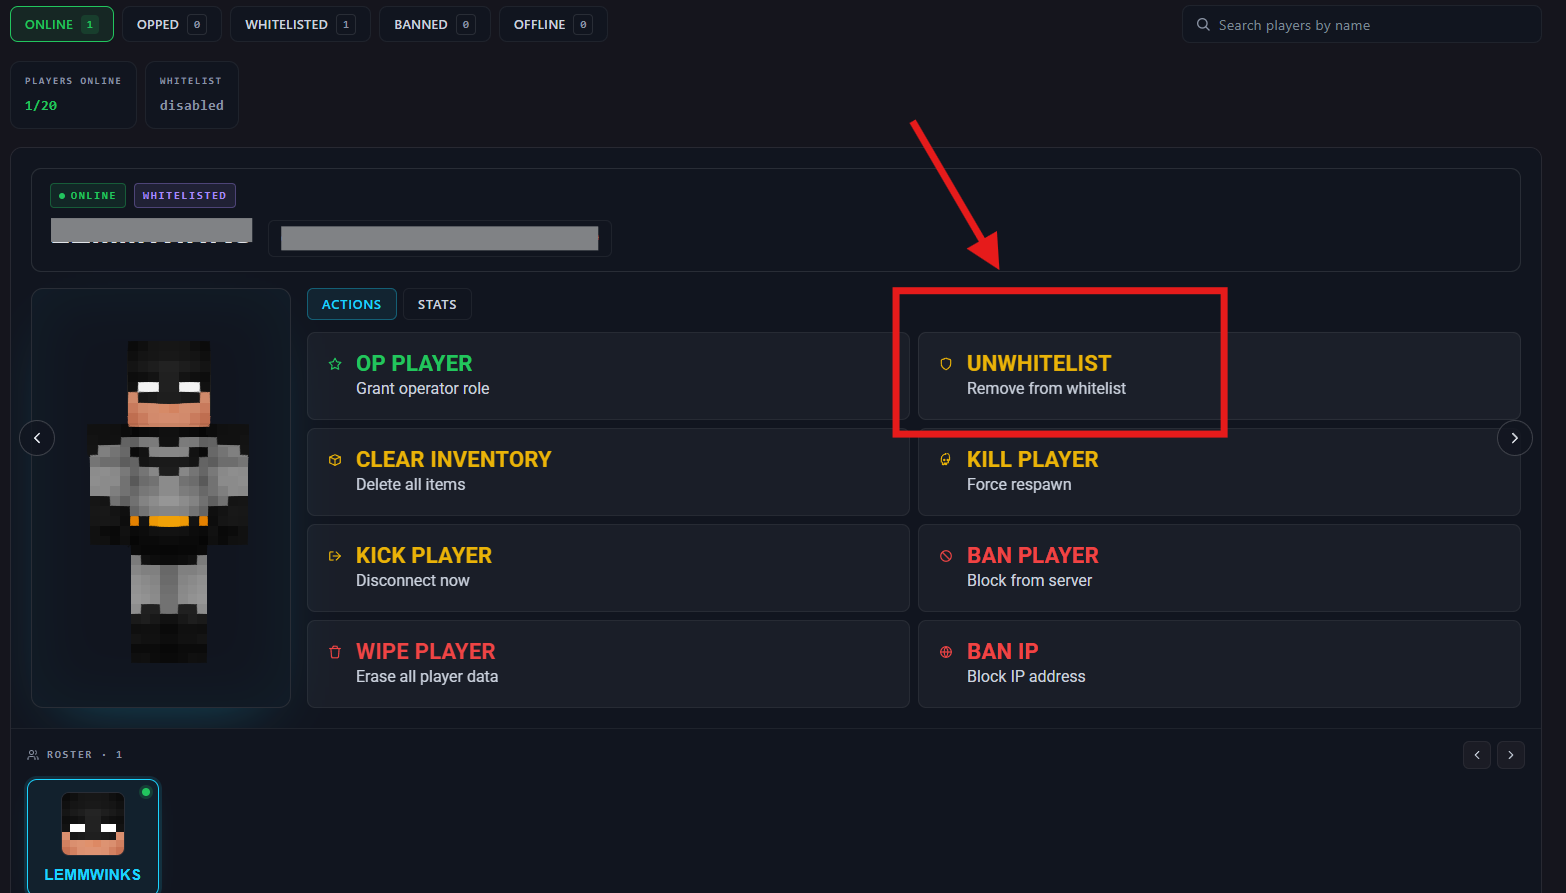
Navigate to Management > Players
Select an existing player and click on “Unwhitelist”. (You can add to whitelist from here as alternatively)
In chat, type /whitelist on to enable.
Type /whitelist off to disable.
Add a player: /whitelist add Steve
Remove a player: /whitelist remove Steve