Mods are a fantastic way to enhance your 7 Days to Die experience - from adding new blocks and items to completely changing game mechanics. Since 7 Days to Die supports mods natively, installing them is quick and straightforward on both your local game and your ChipHead server.
You can find and download mods from trusted websites such as 7daystodiemods.com.
Locate the mod you’d like to install and make sure it matches your game version.
Download the mod.
Once downloaded, unzip the file to extract the mod folder. Inside, you should see a file called ModInfo.xml.
Before joining a modded server, you’ll need to install the same mods on your own game.
Close 7 Days to Die if it’s running.
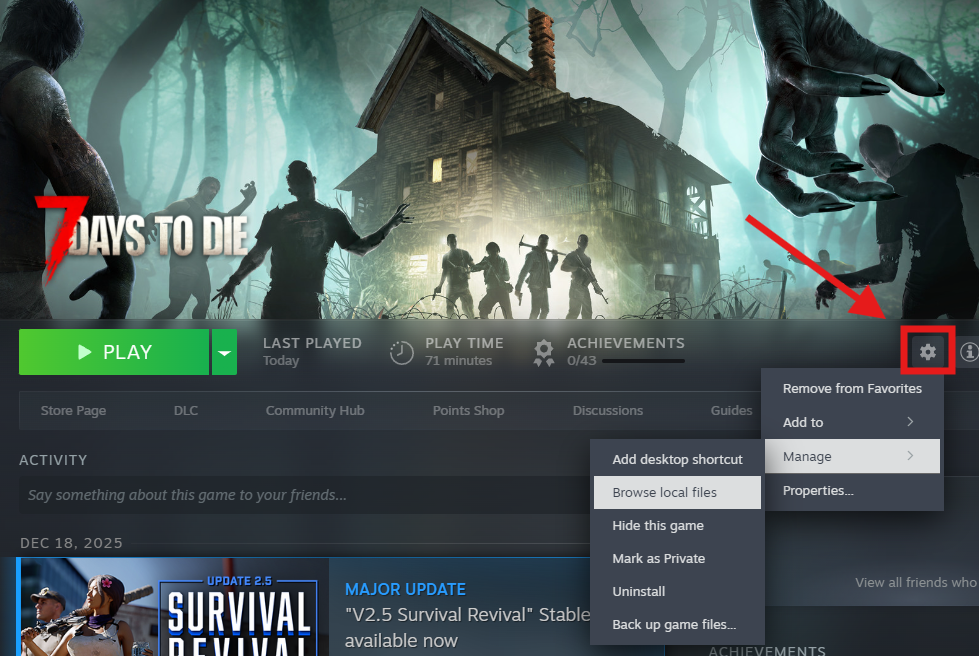
Select 7 Days to Die in your Steam Library and click on settings (cogwheel) → select Manage > Browse local files.
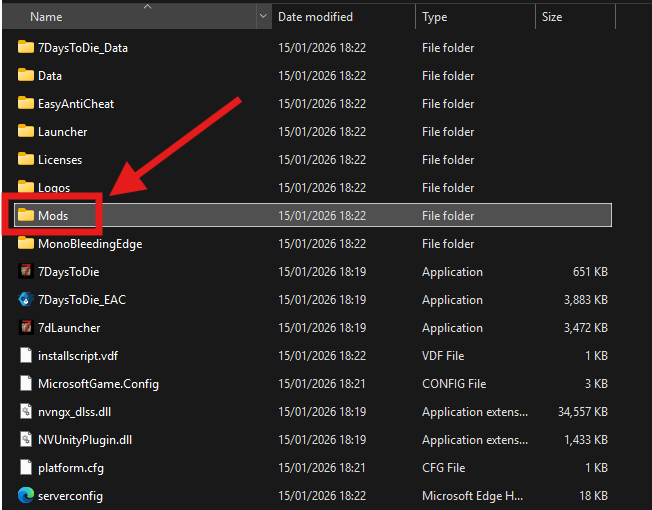
Inside your game directory, create a folder named Mods (if it doesn’t already exist).
Copy your extracted mod folder into this Mods folder.
Your directory should look like this:7 Days To Die/Mods/[ModName]/ModInfo.xml
Launch the game - your mods will now automatically load!
To install mods on your ChipHead server:
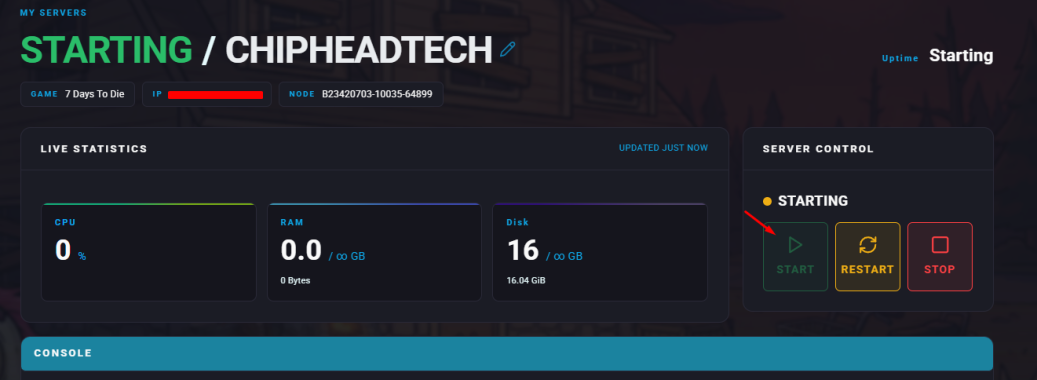
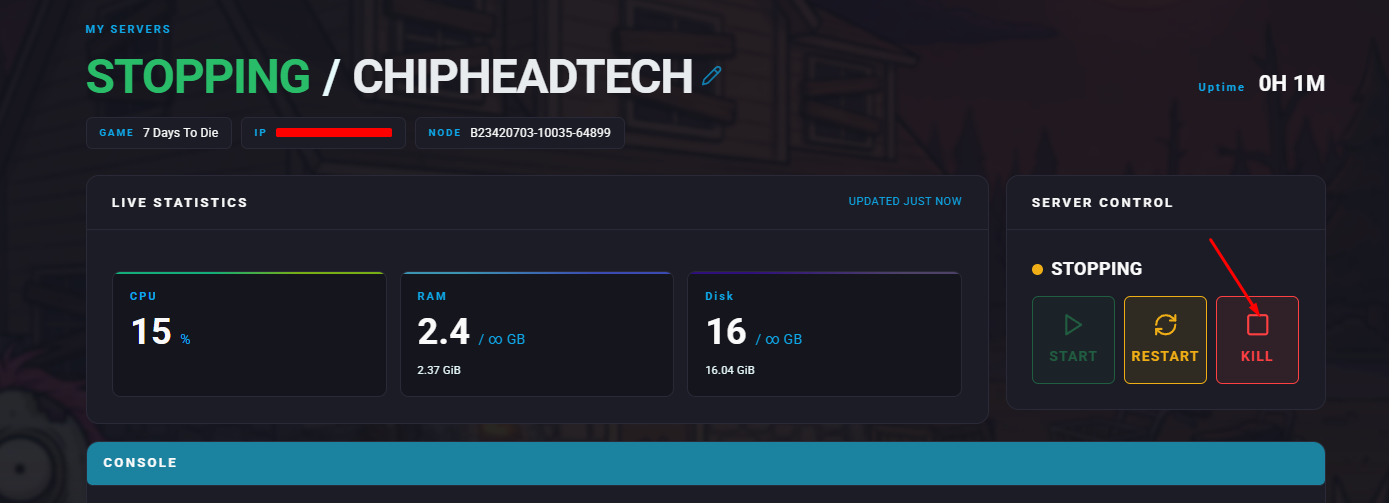
Log in to your ChipHead Panel and stop your server.
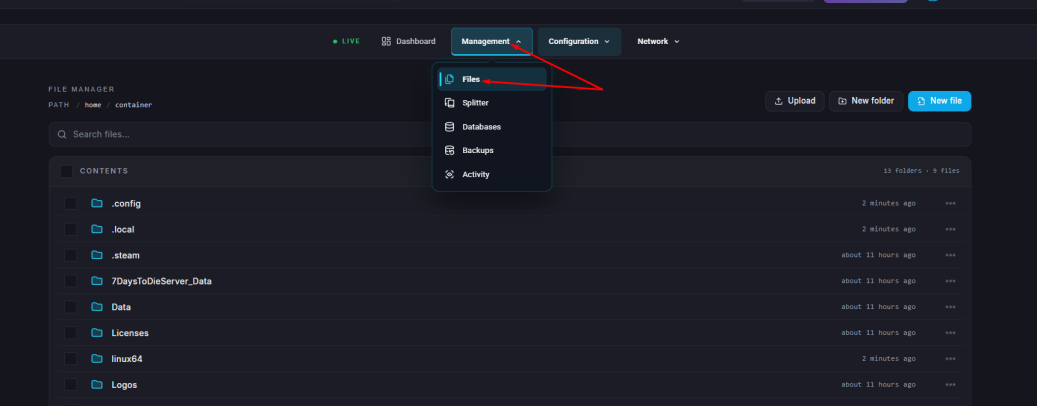
Go to the Files tab.
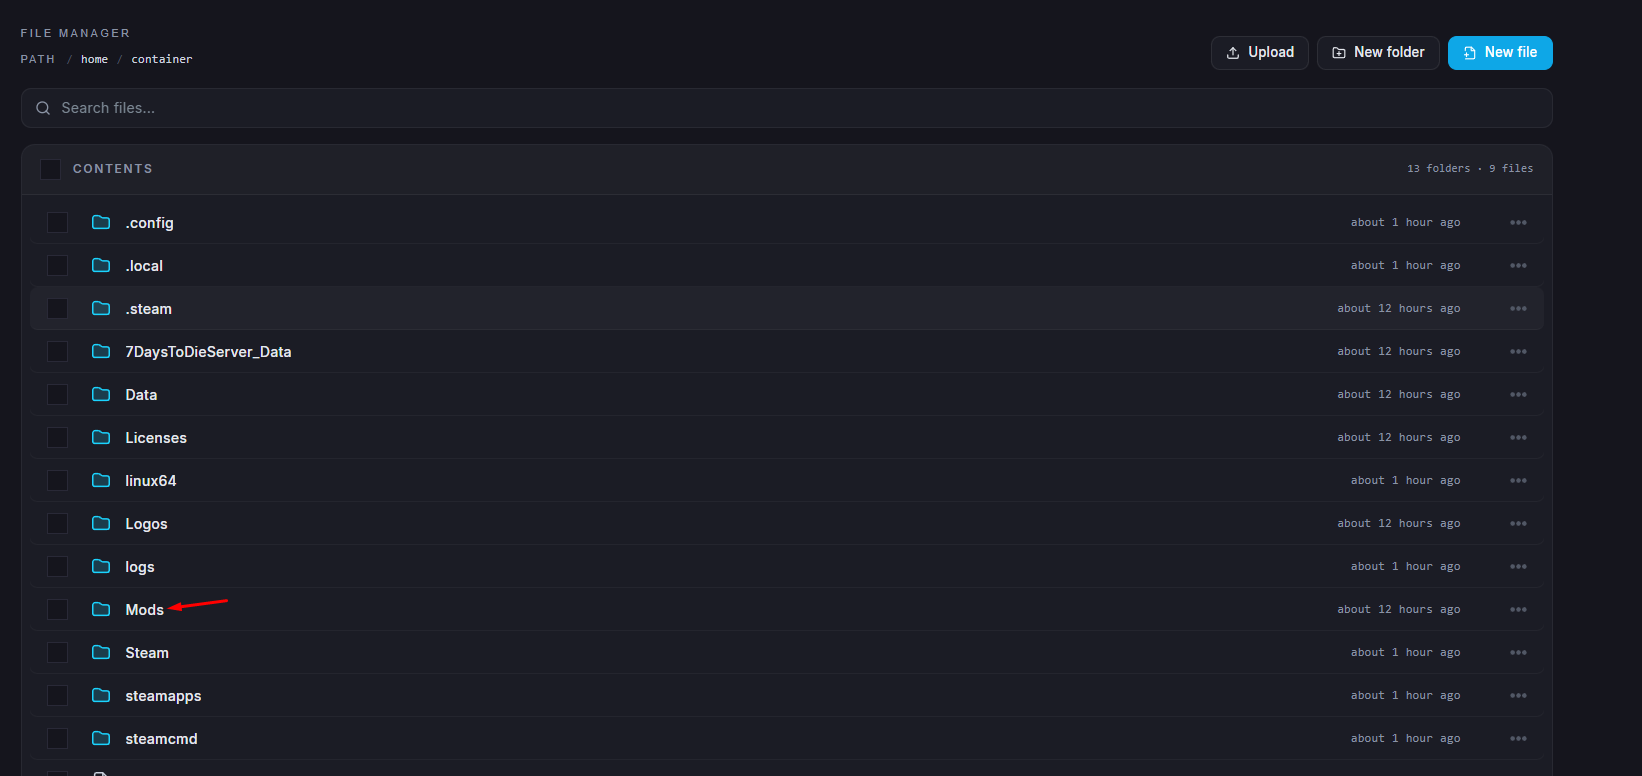
If it doesn’t exist already, create a folder named Mods and open it.
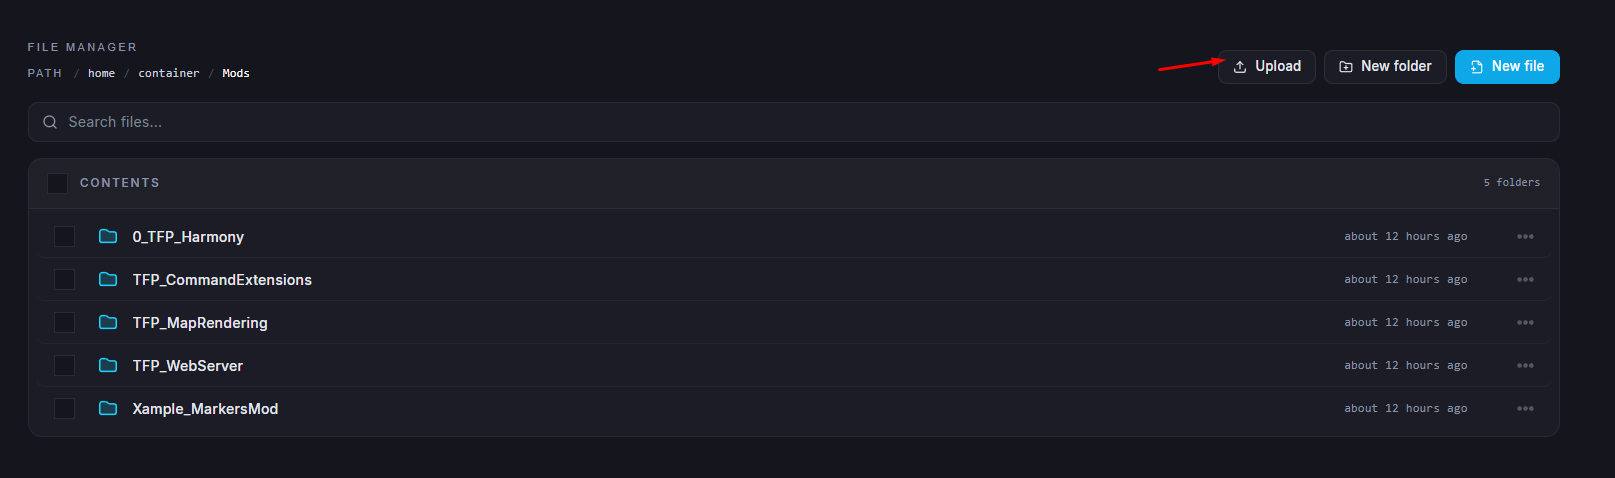
Upload your extracted mod folder here.
The file path should look like:Mods/[ModName]/ModInfo.xml
Start your server again and wait for it to load.